Introduction Last updated: 2022-06-01

BlackArch is designed specifically for penetration testing or, more colloquially, "pen testing". This involves using various tools to access a system by exploiting security holes. "Pen testing", like the term "hacking", is often misunderstood to mean criminals trying to access unauthorized information. But competent system and network administrators routinely carry out pen tests on their own systems to ensure they are safe to use, either by using a distribution like BlackArch or by authorizing a security professional to do the same. BlackArch also contains tools that go beyond simple pen-testing, including some to thwart forensic analysis or to exploit compromised systems. The distribution was initially created for the developers' own use but now is available to the public.

What is Arch Based Linux?

Firstly, we should know about Arch based Linux system before knowing about BlackArch Linux. I have always found Arch Linux as a DIY (Do It Yourself) operating system. From installing to managing, Arch Linux lets you handle everything. Arch Linux is basically a lightweight rolling release Linux distribution for x86-64 architecture-based computers. Arch Linux uses a rolling release model, meaning there are no "major releases" of completely new versions of the system; a regular system update is all that is needed to obtain the latest Arch software; the installation images released every month by the Arch team are simply up-to-date snapshots of the main system components. Everything is fresh and cutting edge in the rolling release model. You don’t have to upgrade operating system from one version to another. Just use the pacman command( $pacman -Syu) and you always have the latest version. It is open-source and contains both libre and proprietary software because of its flexibility-based philosophy. It is focused on simplicity, modernity, pragmatism, user centrality, and versatility. In practice, this means the project attempts to have minimal distribution-specific changes, and therefore minimal breakage with updates, and be pragmatic over ideological design choices and focus on customizability rather than user-friendliness.

Some popular Linux distributions based on Arch:

  • Manjaro Linux
  • ArcoLinux
  • EndeavourOS
  • RebornOS
  • What is BlackArch Linux?

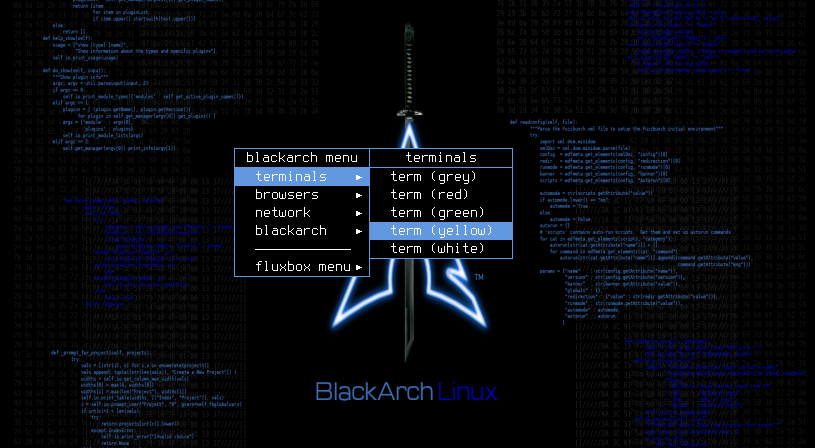
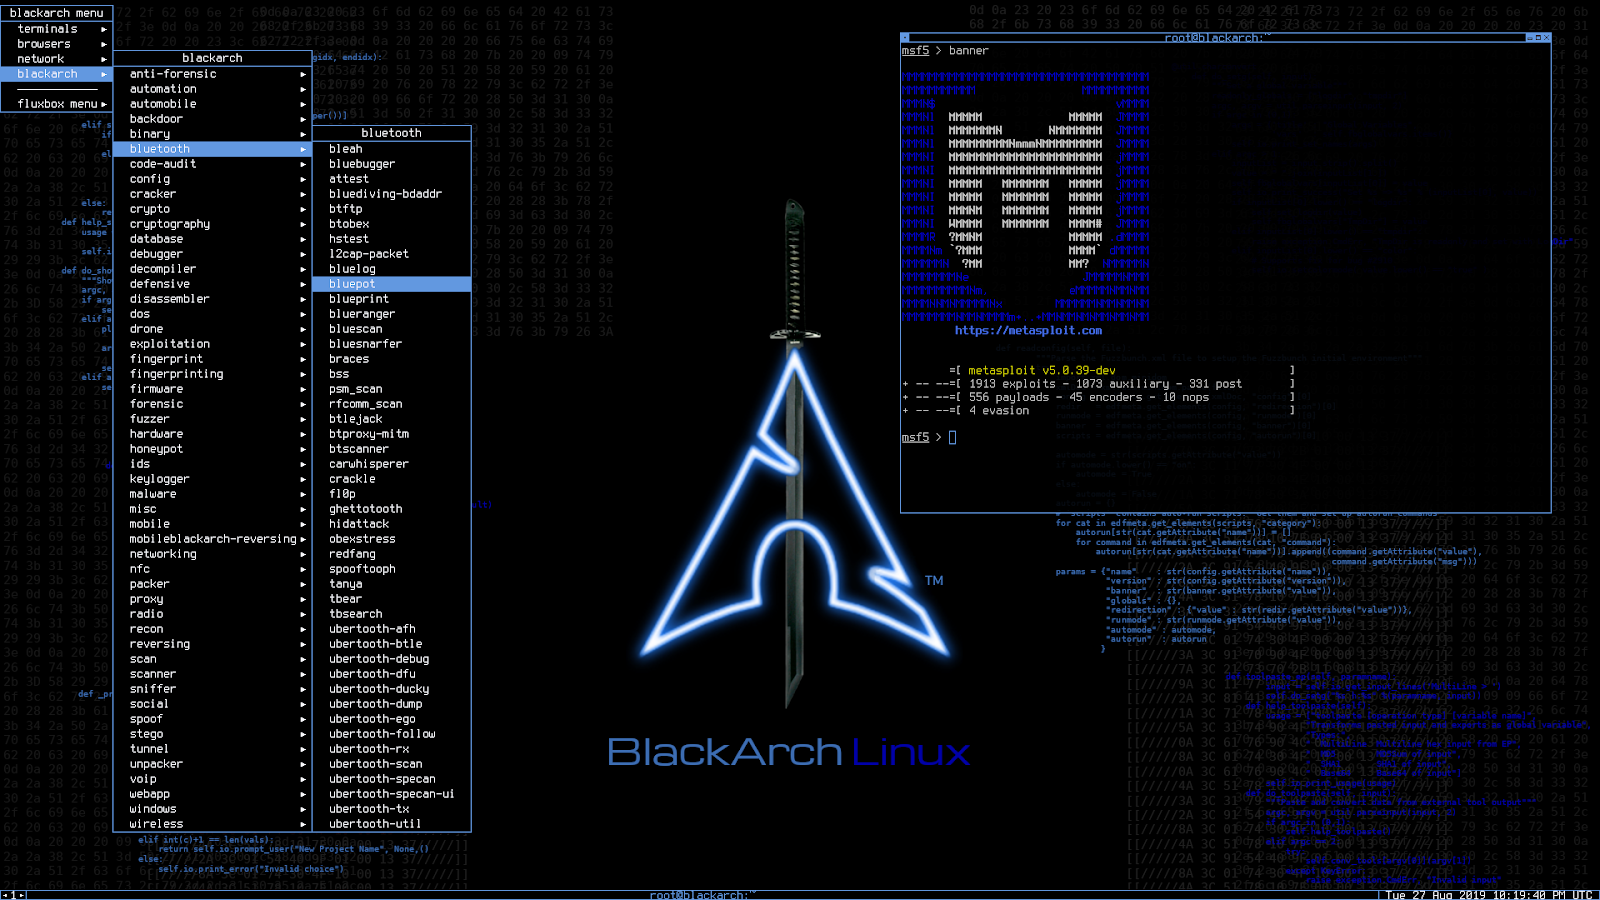
    The BlackArch is an Arch Linux based, open-source penetration testing distribution tool. It is used by the peoples and officials interested in cyber security and penetration testing that provides a large number of cyber security tools. The distribution is very famous among security researchers and penetrations testers. The repository contains more than 2700 tools. You can install tools individually or in groups. BlackArch Linux distribution is compatible with current installs of Arch Linux and provides a very efficient and powerful environment one can possibly imagine off.

    BlackArch Linux Features

    BlackArch is a penetration testing distribution based in Arch Linux that provides a large amount of cyber security suits. It is an open-source distro created specially for penetration testers and security researchers. Here are some of the BlackArch features :

  • A live ISO with multiple window managers.
  • Support for multiple architectures.
  • An installer with the ability to build from source.
  • More than 2700 tools.
  • Install package individually or in groups.
  • BlackArch is designed for the professional in mind.
  • Doesn't need a GPU to run but requires one for it's GPU attacks.
  • Its very minimalistic
  • Why I Should Use BlackArch?

    BlackArch is a Linux pentesting distribution based on ArchLinux. If you're not familiar with ArchLinux, or Linux in general,I strongly suggest you to avoid BlackArch due to the learning curve for new users. This distro is good for them who totally know what they are doing, what they have to do and what being done . Its specially developed for Hacking or Penetration Testing .If you are into cyber security or you want to learn, should go with this OS. Its not about the disk space of your computer but its about the requirements.BlackArch is little bit complex for beginners because its not as simple as Kali and parrot though they contain same tools with different working environments at same time. You must have good knowledge about Linux to use BlackArch .Its True it contains more tools than Kali and Parot OS.BlackArch is so simple and minimal and its has it own benefits.If you like simplicity and want to perform only one task in your distro or you have less configured pc then blackarch is good for you.

    But If you have No knowledge about Linux and you want a Linux distro for your daily task done i would suggest Ubuntu. In another case if you want to learn Linux System from sratch i would suggest Redhat.

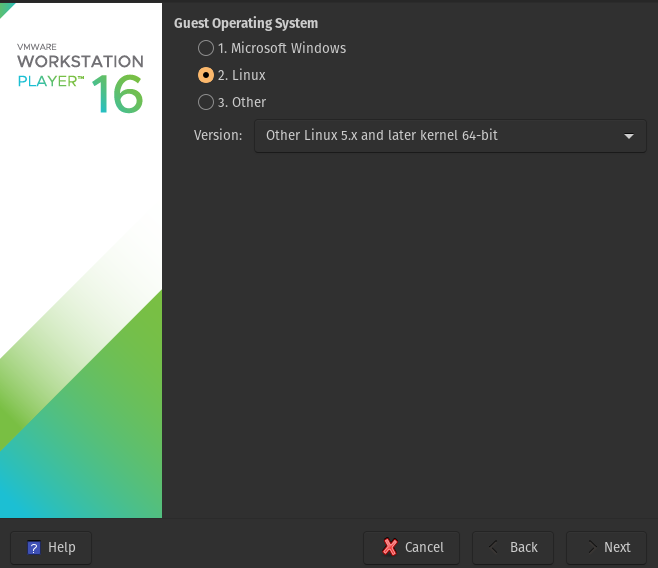
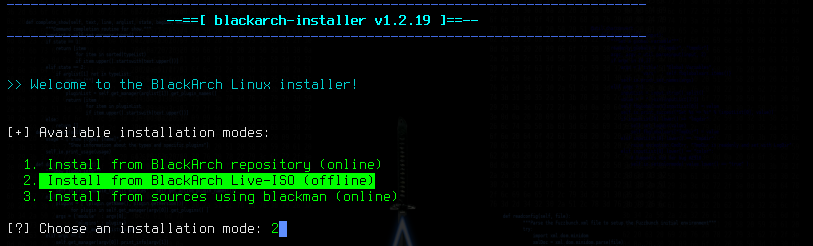
    Which ISO Image Should I Download?

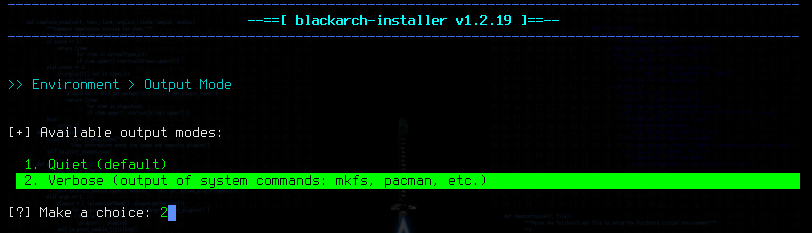
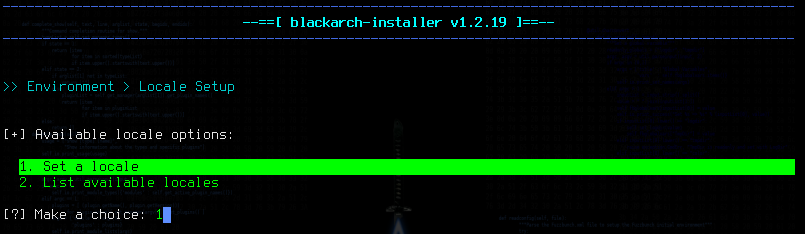
    The Official BlackArch Linux page contains full, slim and netinstall ISO images. You can burn these images to DVDs and flashdrives The full ISO contains a complete, functional BlackArch Linux system with all the available tools in the repo at build time. The slim ISO contains a functional BlackArch Linux system with a selected set of common/well-known tools and system utilities for pentesting. The netinstall ISO is a lightweight image for bootstrapping machines with a minimal set of packages. If possible, please try to use a mirror near you to download the ISOs. You can find a list of mirrors below of official blackarch site.

    Full ISO

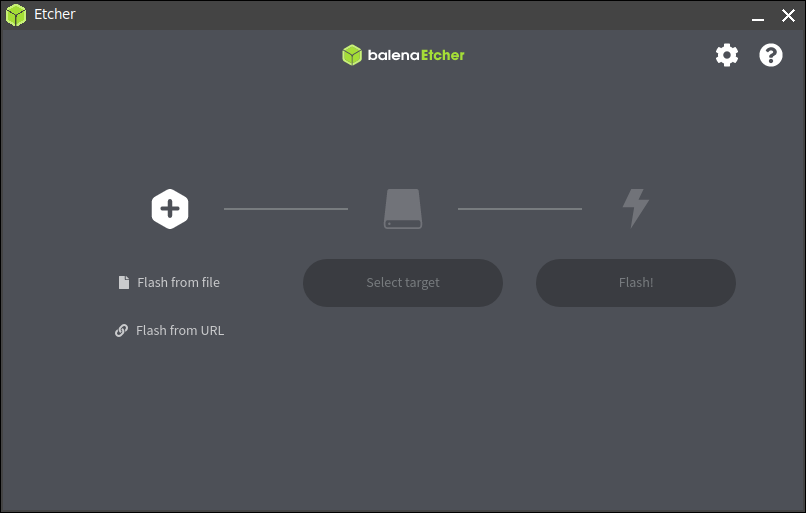
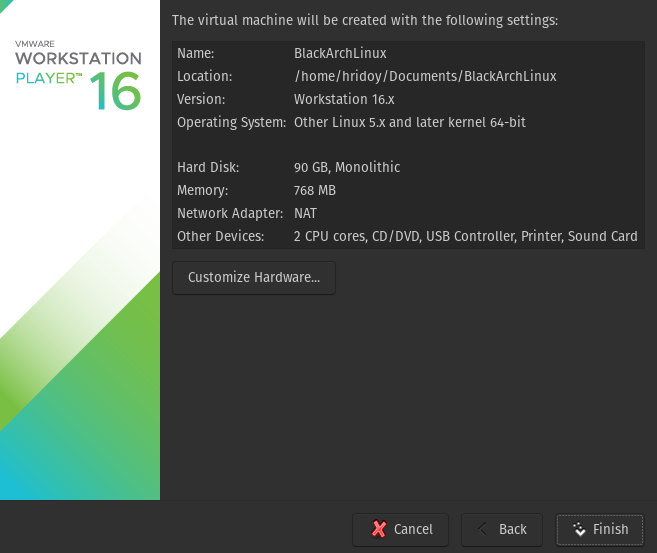
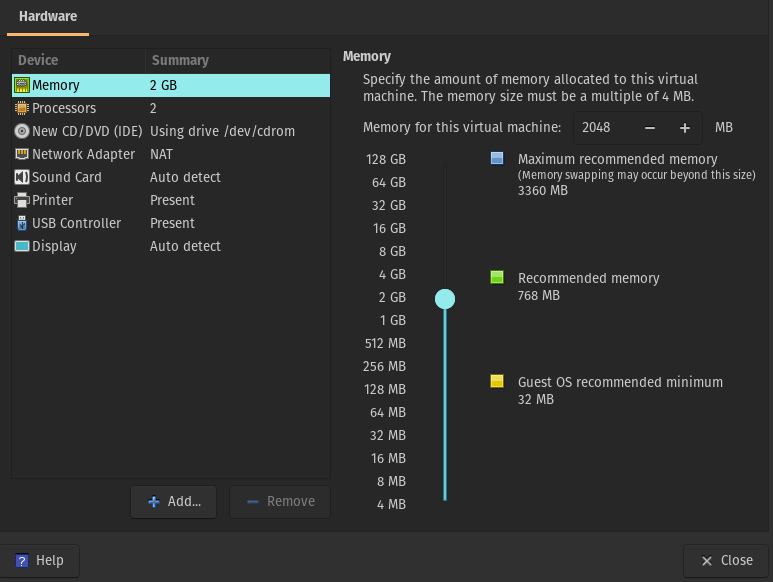
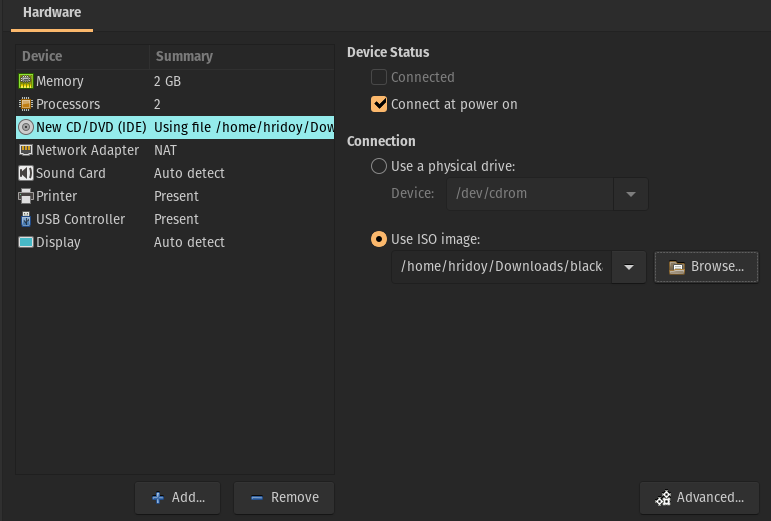
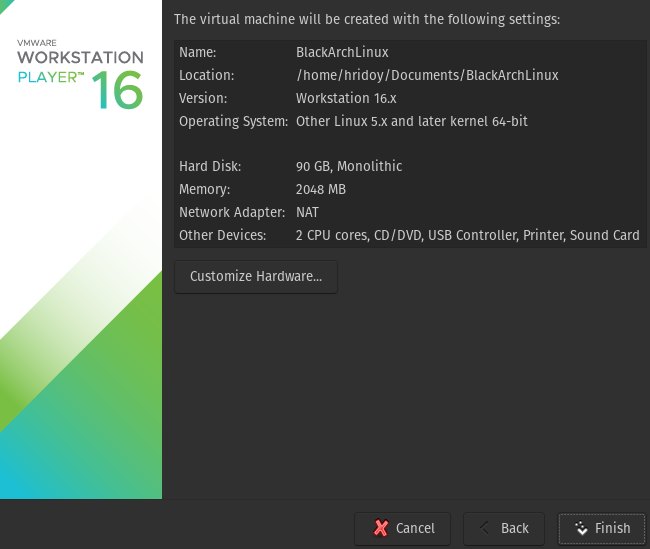
    If you want to boot by usb offline you should download full ISO for oflline installion or Virual Machine installation. Make sure to choose the right ISO. Check if your hardware supports virtualization. If so enable it in your UEFI/BIOS settings. If not, you must use the 32 bit ISO. Qemu with KVM was successfully tested and can be used instead of VirtualBox

    Slim ISO

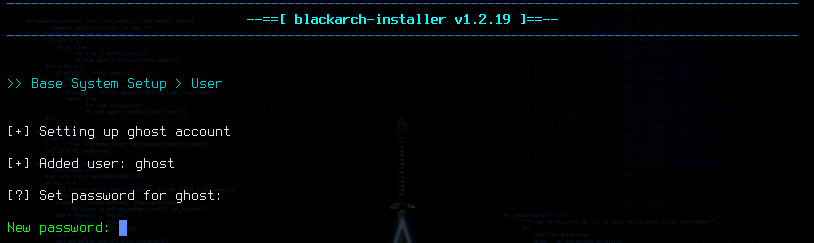
    You can install BlackArch Linux using the Slim medium which features GUI installer. Just double click on the Install BlackArch icon on the desktop. Follow the instructions on the GUI installer.

    OVA Images

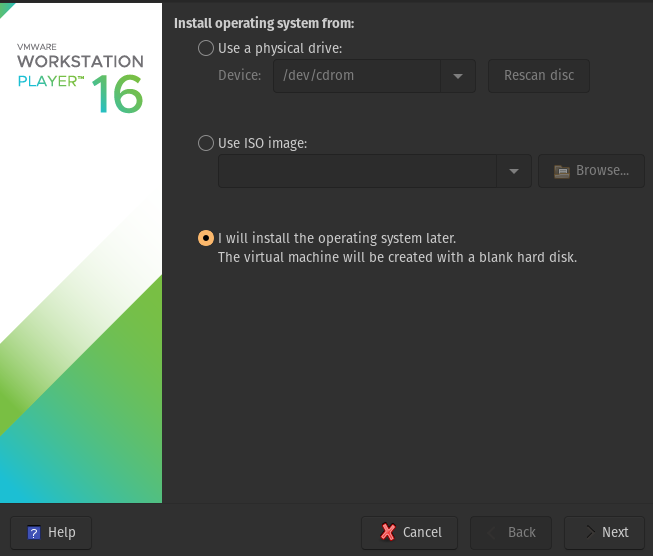
    The OVA is just a prepackaged image for convenience - its not going to be any different than the ISO installed on a virtual machine. Its literally just a "image" of a running machine, but without a UID etc. All packages are maintained and receive security updates.You need a virtual machine for import the OVA image .

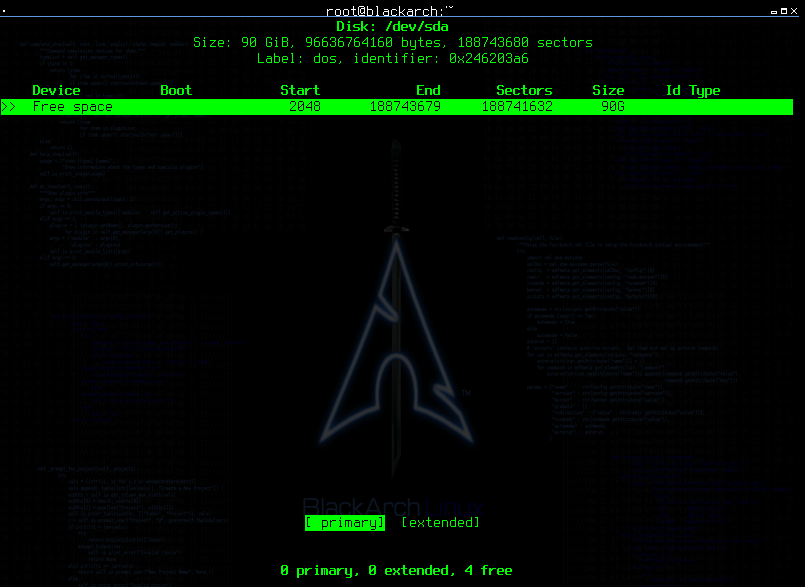
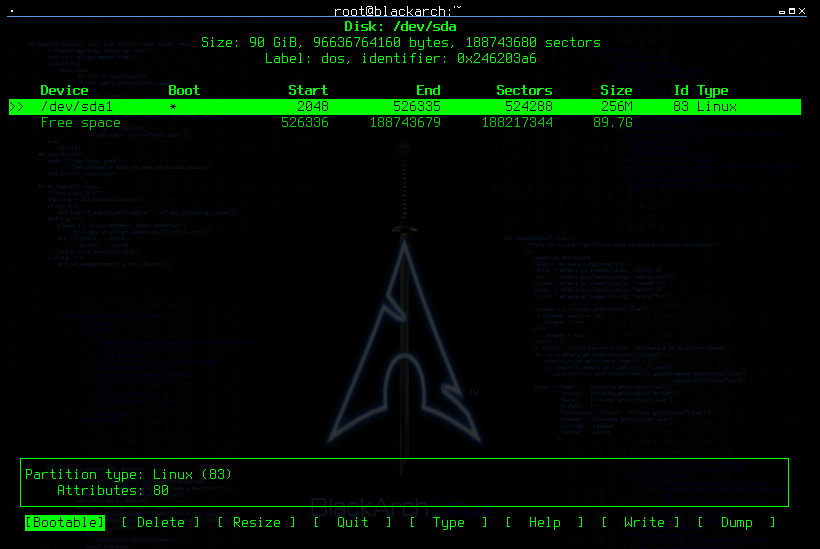
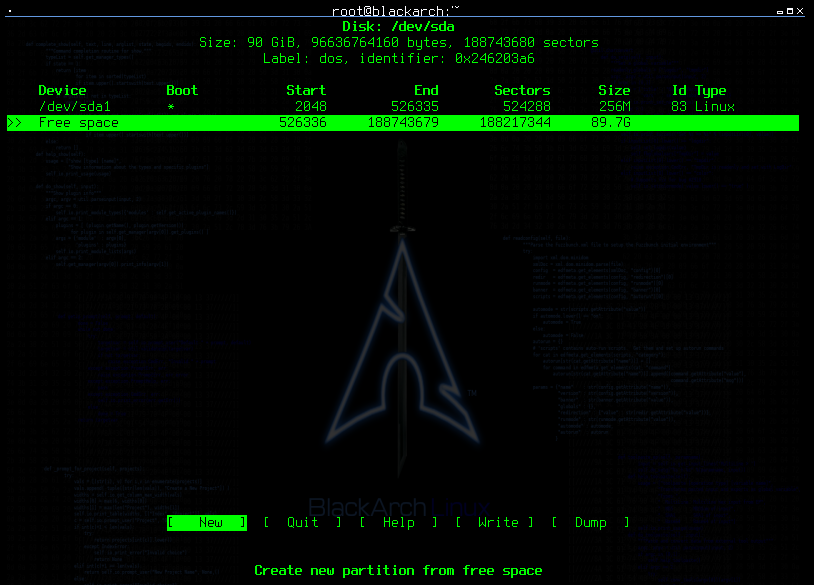
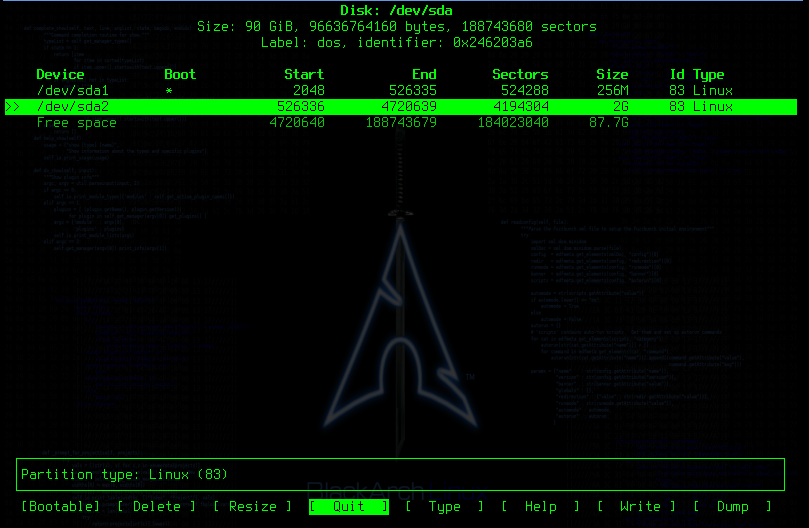
    Which Desktop Environment and (Meta)Packages to Choose During Installation:

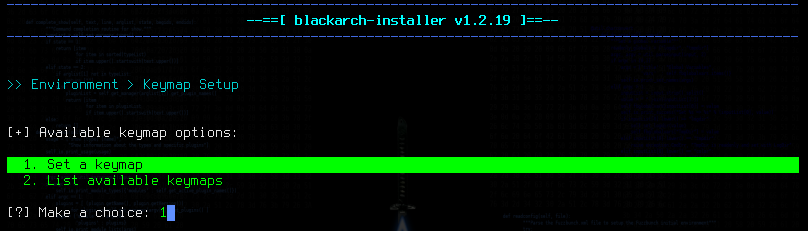
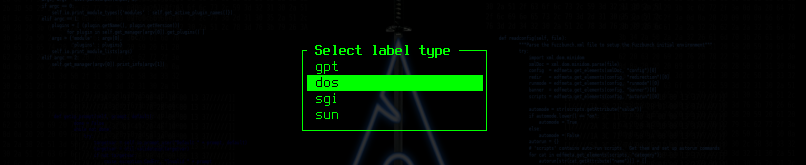
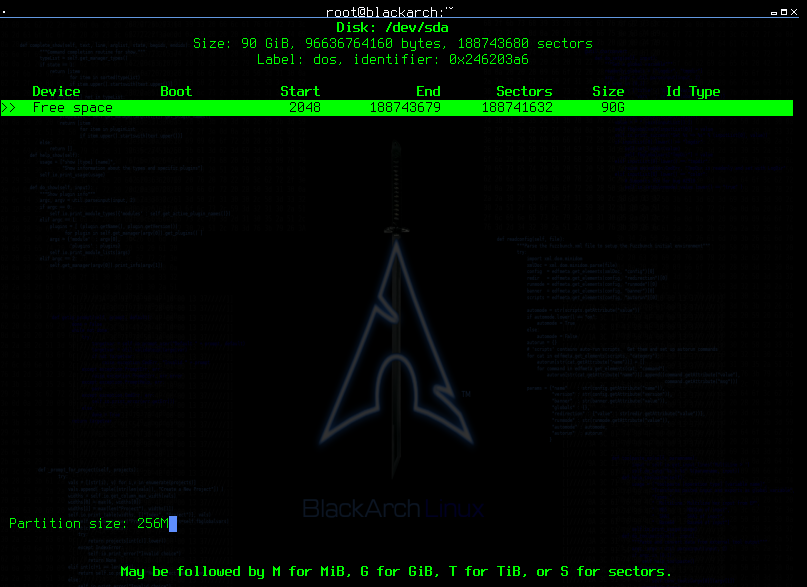
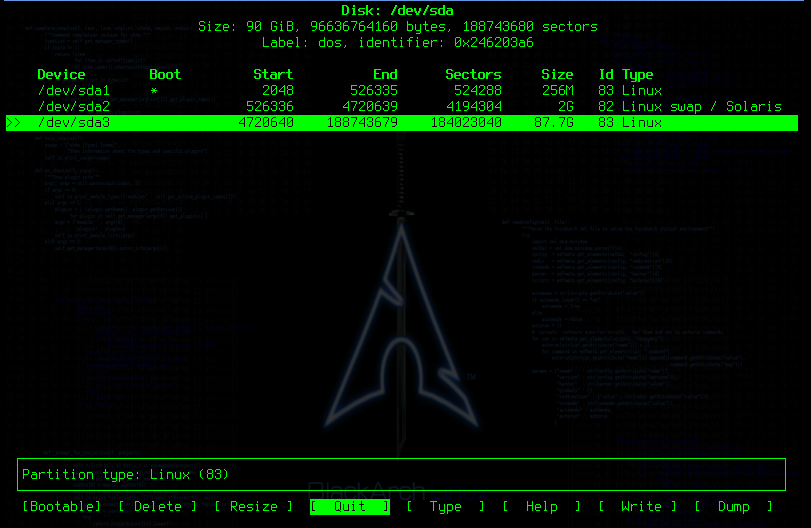
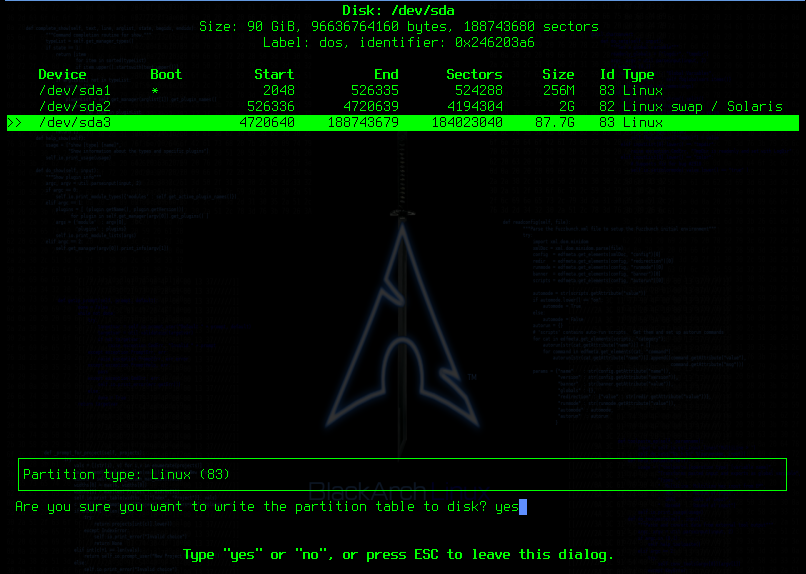
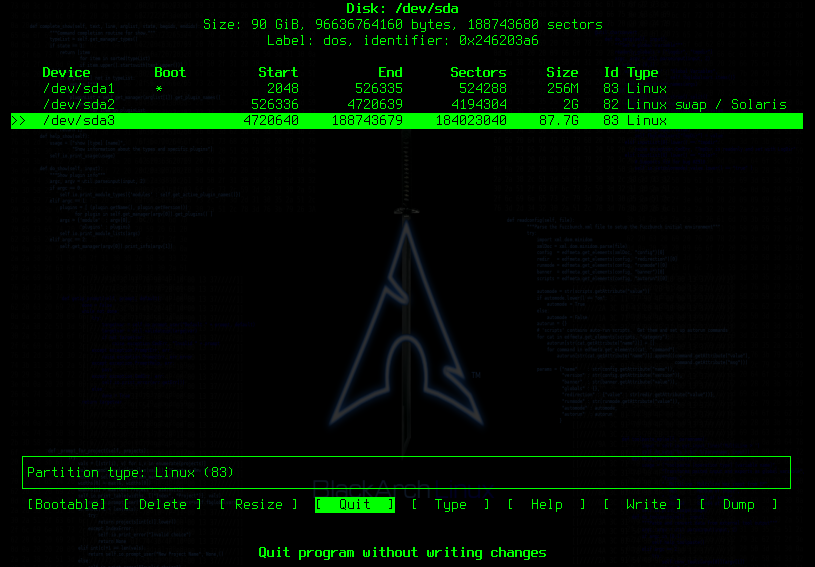
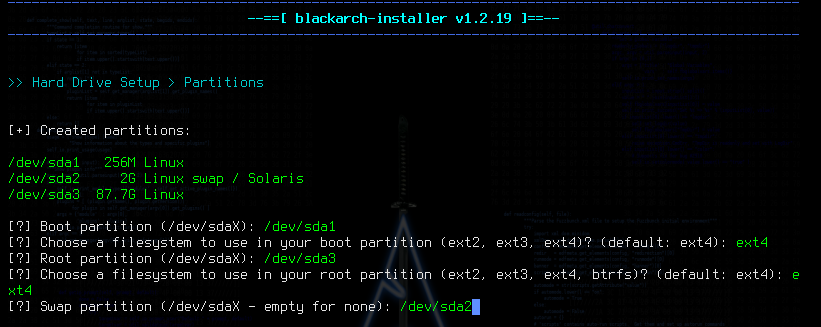
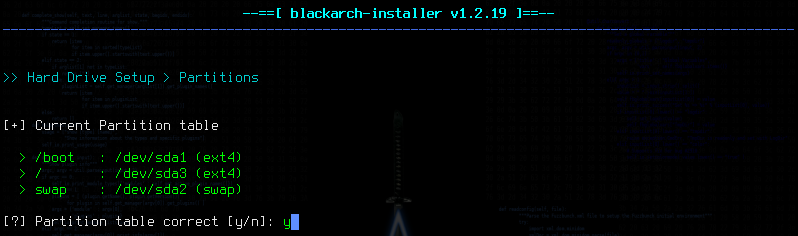
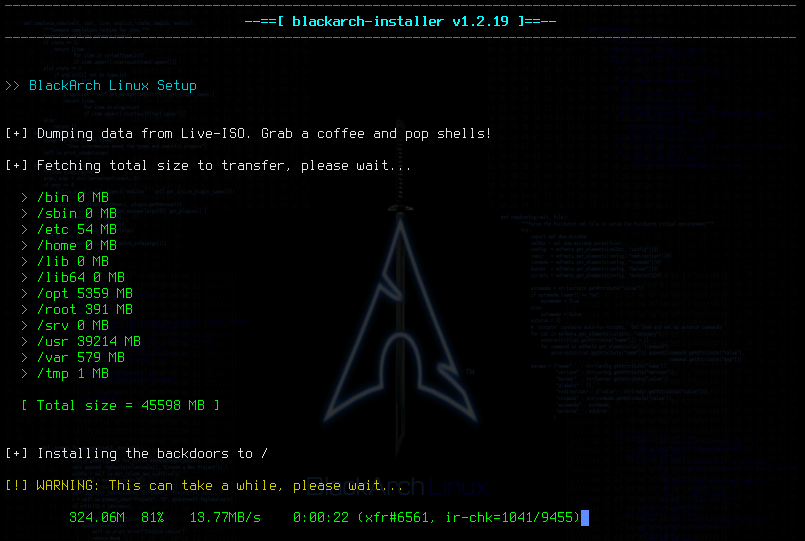
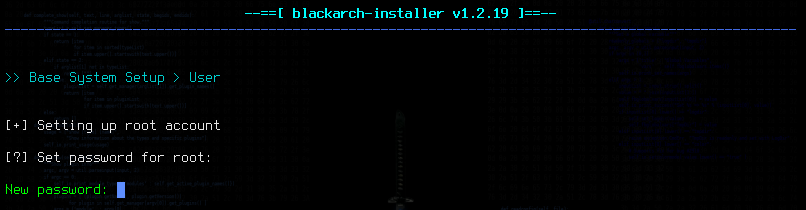
    BlackArch Linux is an Arch Linux-based distribution for penetration testers and security researchers. In the list of top 5 Linux distros for hacking it will be a very difficult situation for … All graphical applications, including your desktop environment, are built on top of Xorg. Just like LXDE & MATE, XFCE Desktop Environment is one of the lightweight desktop environments out there. LightDM — Cross-desktop display manager, can use various front-ends written in any toolkit. So, install the bundle, and Arch will set it all up. I also suggest enabling Network … They use their own repositories and wait a little bit longer to update packages, so they are not so bleeding edge as Arch, but still way more up to date than Ubuntu. The non-free option will load the proprietary N… Is possible we make arch linux looks like Blackarch like when we right click and it does show all the tools. You now have to setup the partitions. Select Linux swap, solaris and press enter. You will have the choice to download the VirtualBox guest additions/packages, if you are not interested, press n and hit enter. When you confirm the password, the root partition will immediately be encrypted. BlackArch The repository is ever-growing. You now have to select the keymap you want. Some desktop environments may also support Wayland as an alternative to X. BlackArch is similar in usage to both Parrot OS and Kali Linux when fully installed.

    Installation

    This tutorial will show you how to install BlackArch Linux using ISO and blackarch-installer. VMware Workstation is used in this tutorial, but if you prefer other virtualization software you can also use them. We assume that you have finished burning on USB or DVD and you are ready to install ,if your are not then look at down for USB boot.

    USB Boot

    Make a bootable USB for BlackArch Linux is very simple.You need a 32GB usb drive, its perfect enough.Then you need a Live ISO image. You will find Live ISO image as named Full ISO Image on BlackArchs official website. Now you need a efficient image burning tool.I would suggest " balenaEtcher " here. It is a hassle-free solution that allows you to burn your chosen OS to an SD card and other removable hard-drives without any complications. It is a handy tool to have if you want to save a boot image in a flash.Its very simple to do .Go to balenaEtcher website download the tools and run it then select your iso file from storage and then select your connected USB flash drive on balenaEtcher and then click on Flash .You will ready to go after burning the ISO image to your USB Flash drive .


    VMware Boot

    Go to the Blackarch official download page, there you will find various download options.There you need to download the Full ISO(Live ISO) file. Always try to dowload the ISO file from official website , so you can be sure that you are not downloading any malicious files. Then you need to download the VMware Workstation for 32 or 64 bit bit according to your pc configuration .

    Download VMware Workstation


    Now folow the steps below:


    Step 1: After downloading VMware you need to install and open it .The interface should be look like this.


    Step 2: Click on "creat a new virtual machine".Then choose "I will install the operating system later" and click next.


    step3: Select Guest Operating System as Linux .After that choose version "Other Linux 5.x and later kernel 64-bit".Then Click Next .


    Step 4: Now you need to named your Virtual Machine , you can choose any name you like .Choose a location where you want to store your Blackarch Installation.Then Click Next


    Step 5: Choose your disk size .I choose 90GB here because the OS sytem itself took 50-55GB for installation.select "Store virtual disk as a single file ".


    Step 6:Now click on Customize Hardware .


    Step 7:Choose your Memory(RAM) at Least 1GB.I choose 2GB here for better performance.


    Step 8:Now jump to New CD/DVD there you have to select "Use ISO Image".There you have browse your storage and select the iso file you have downloaded before.


    Step 9:Close the customization and hit to "Finish".


    Step 10:Now you are ready to go.Click on "Power On"


    Step 11:Here you go .Log in as a Root user.Input "root" as a user name and the default password is "blackarch".


    Step 12 :"Congratulations" You cmpleted the boot part and loged in as a root user successfully.


    Install(Same on both USB boot and Virtual Machine)

    I hope you already boot your device and you are ready for installation.In this part i will show you how to install Black Arch ofline.

    Follow the Steps below -


    Step 1:Right click on the screen and Open the terminal.Then type this Command " blackarch-install " and press Enter.


    Step 2:The Blackarch installer will be start from now.Now you have to select installation mood .Here i will show you Offline installation of LIve-ISO.Choose number 2 and press enter.


    Step 3:Now you have to choose the ouput mood .Here is two type of output mood.I selected the Verbose mood.


    Step 4:You have to set a local .If you want to see the local list select 2 and for set a local select 1


    Step 5:I will left this part as default.If you want you can set others local by seeing the list. Press Enter.


    Step 6:Now you have to select your Keymap(Keyboard Layout).Choose number 1 and press enter.Here i will keep the keymap default .If you want you can choose other keymaps by seeing the list .


    Step 7:Set your hostname .You can set whatever you want.


    Step 8:Here you have choose your hard disk where you want to install your Blackarch.If you do dual boot here will be many disk available.But for virtual machine one disk will be available.Type "sda" and hit enter .After that tere wiil be option for dual boot setup .If you are doing single boot and vmware installation then type "n" and press enter .


    Step 9:Creat partition is important here .Type "y" here and press enter . After that there will be option for in-memory zeroed partition, type yes again.Select dos as a label type.


    Step 10:The partition manager will be open .Here you need to creat boot,root and swap parttion .Its very easy creat partition .For boot partition we don't need much space.So press on [ New ] to create partition and give 256M for boot space and set as Primary partition.Create bootflag on this partition by press [ Bootable ] .


    Step 11:After that you need to create swap partition.Set 2G for the swap partition and set as primary partition as well.Set the type Linux swap / Solaris. Its optional to create swap partition but it will increase the performance.If you don't want to create, its totally fine.Those who have less RAM, it will help them a lot.


    Step 12:Set root partition now .How much storage you left set them all as a root partition.Also set this partition as a primary .After that select [ Write ] to set patition label and enter yes.Then [ Quit ] the partition manager.


    Step 13:Set no for encryptep root.


    Step 14:Now you have to tell the installer which partition you will use for boot,swap and root.First set the boot partition by typing /dev/sda1 and set ext4 as its filesystem.After that set root partition by typing /dev/sda3 and ext4 for filesystem .Then lastly set swap partition by typing /dev/sda2 .After that hit enter and give permission for formatting partition. It will be automatically dump data from Live-ISO.This process will take so much time .You can grab some snacks and coffe for pass the time.


    Step 15:Set new password for root.You can also set a normal user account if you want type y.Then set your time-zone as default cause you can change it later.


    Step 16:Reboot the system by tyoing reboot.Thats all.


    Congratulations you install the Blackarch successfully

    Basic Commands

    Section intro goes here. Lorem ipsum dolor sit amet, consectetur adipiscing elit. Quisque finibus condimentum nisl id vulputate. Praesent aliquet varius eros interdum suscipit. Donec eu purus sed nibh convallis bibendum quis vitae turpis. Duis vestibulum diam lorem, vitae dapibus nibh facilisis a. Fusce in malesuada odio.

    Learn Basic Commands

    BlackArch Commands

    Here i am going to show you a few essential things to do after installing Arch Linux. This will help you get started with Arch Linux so that you can explore it further. Arch Linux is sort of expert domain and i believe if you use Arch, you are not afraid of using the terminal. This is why the steps mentioned here are command line based.

    1.Update your system

    I hope you already using the latest release, but it’s always advisable to check for the latest update for your Arch System:

    sudo pacman -Syu

    2.Installing X server

    Before installing a desktop environment (DE), you will need to install the X server which is the most popular display server.

    sudo pacman -S xorg

    Once it’s completed, use any of the below commands to install your favorite desktop environment.

      Install GNOME:
      sudo pacman -S gnome gnome-extra

      To install Cinnamon:

      sudo pacman -S cinnamon nemo-fileroller

      To install XFCE:

      sudo pacman -S xfce4 xfce4-goodies

      To install KDE:

      sudo pacman -S plasma

      To install MATE:

      sudo pacman -S mate mate-extra

      You will also need a display manager to log in to your desktop environment. For the ease, you can install LXDM.

      pacman -S lxdm

      Once installed, you can enable to start each time you reboot your system.

      systemctl enable lxdm.service

      Reboot your system and you will see the LXDM login screen, select your desktop environment from the list and login.


      3. Install an LTS kernel

      Why should you install LTS kernel in Arch Linux when it is supposed to be cutting edge?

      Installing an LTS kernel means you have a more stable kernel with better support to older hardware. Also, the LTS kernels are supported for at least 2 years with bug fixes and performance enhancements.

      If you rather choose to use the latest Linux kernel, you may find regression and bugs introduced by the latest kernel updates to your existing software and system. It’s not a certainty but it is definitely a possibility. For example, a Kernel update broke GNOME in Arch based Linux some time back.

      This is why it is advisable to use an LTS kernel if you prefer a more stable system and/or have an older one. But the decision is yours to make.

      Before you install an LTS kernel, check the Linux kernel version you are using.

      uname -r

      To install the LTS kernel and Linux LTS headers, type the below command:

      sudo pacman -S linux-lts
      sudo pacman -S linux-lts-headers

      At this point, the LTS version is the default one.

      Once done, you can remove the older kernels by typing the below command. However, I prefer to keep it in “case” something goes wrong, I can boot into the other Linux kernel version.

      sudo pacman -Rs linux

      4.Installing Yaourt

      Yaourt stands for Yet AnOther User Repository Tool which can be used to search, download and install packages from the official repository as well as AUR. Arch User Repository or AUR is a community-driven repository for Arch users and contains package descriptions to compile a package from source and install it. Most of the packages that make to the official repository start in the AUR first. Users contribute their own applications which are voted for or against and once it becomes popular enough, they are included in the official repository. AUR contains lots of useful applications that are not found in the main repo can be installed from AUR with help of Yaourt. Yaourt is similar to what Synaptic Package Manager does, and can be installed by following these steps:

      [archlinuxfr] 
       SigLevel = Never
       Server = http://repo.archlinux.fr/$arch

      Save the change. Install Yaourt with the below command

      sudo pacman -Syu yaourt

      Use the command below to sync Yaourt with AUR:

      yaourt -Syy

      To install AUR packages, you can the below commands :

      yaourt -S package-name

      5. Install GUI Package Manager Pamac

      The default package manager for Arch Linux is Pacman (Package Manager) and using Pacman is quite easy to install or remove a software. However, it’s sometimes difficult to talk in commands. Pamac provides a GUI option for Pacman and works like Synaptic Package Manager or GNOME Software. Pamac serves as a GUI tool for installing or updating packages and works well with Arch User Repository AUR.

      Before you can use Pamac, you will need to have Yaourt (or Packer) installed first. Once done, type the below command in terminal to install Pamac.

      yaourt -S pamac-aur

      You can launch the GUI by searching for Add/Remove Software. It will show different packages that are available and installed and which all updates are needed.

      However, by default, the AUR packages are not enabled. To enable it, click on the options just beside the search option) and choose Preferences. Under the AUR tab, Enable AUR support.

      6. Installing Codecs and plugins

      Of course, you are going to use your personal system for recreational works like watching videos and listening to your favorite song. But before that, you will have to install codecs for these audio and video files.

      Type the below command in the terminal:

      sudo pacman -S a52dec faac faad2 flac jasper lame libdca libdv libmad libmpeg2 libtheora libvorbis libxv wavpack x264 xvidcore gstreamer0.10-plugins

      However, installing a media player like VLC imports all the necessary codecs and installs it.

      sudo pacman -S vlc

      You may add a music player too:

      sudo pacman -S amarok

      7.Installing productive software

      For day to day use and setting up your Arch system for productive use, you need some basic applications like an office suite, email client, a web browser etc.

      sudo pacman -S libreoffice thunderbird firefox 
      gedit flashplugin skype dropbox aria2

      Aria2 is a download manager, LibreOffice is the most popular open source office suite, Thunderbird is a cross-platform mail and chat client, Firefox is an open source and free web browser, Gedit is an editor, flashplugin installs flash, Skype is a popular messaging and video calling software and Dropbox – to store your file for anytime access.

      Along with these, you will need archive managers

      sudo pacman -S p7zip p7zip-plugins unrar tar rsync

      This is of course just a suggestion. You can install essential Linux applications of your choice and your requirement.

      8.Customizing the looks of your Arch Linux desktop

      You can customize your Arch Linux by installing some nice flat themes or the conky monitoring tool.

      Installing themes

      Some of the most liked themes are Arc GTK, flatplat, Vertex and Numix, which can be installed by below command:

      yaourt -S arc-gtk-theme flatplat-theme-git vertex-themes
      sudo pacman -S numix-themes

      Go to settings > Appearance and change the default theme from there.

      Installing Conky

      Conky is a free system manager application which can monitor and display memory usage, CPU statistics, disk storage, swap, CPU temperature and more. To install conky, use below command :

      sudo pacman -S conky

      You can configure conky yourself which will need some digging into the ~/.conkyrc file or you can download your favorite one from web and replace the default conkyrc file. There is a detailed tutorial about conky and its configuration on the Arch Linux website.

      Rmove any Package

      At any point in time, if you feel like removing any application (and its dependencies), you can use these commands:

      sudo pacman -R package-name

      It removes the package without removing the dependencies. If you want to remove the dependencies but leaving out the ones which are being used by some other application, below command will help:

      sudo pacman -Rs package-name

    Section Item 3.3

    Vivamus efficitur fringilla ullamcorper. Cras condimentum condimentum mauris, vitae facilisis leo. Aliquam sagittis purus nisi, at commodo augue convallis id. Sed interdum turpis quis felis bibendum imperdiet. Mauris pellentesque urna eu leo gravida iaculis. In fringilla odio in felis ultricies porttitor. Donec at purus libero. Vestibulum libero orci, commodo nec arcu sit amet, commodo sollicitudin est. Vestibulum ultricies malesuada tempor.

    Top Used Tools

    ​Blackarch allows you to install tools individually or in groups with the modular package feature. To list all of the available tools, run – pacman -Sgg | grep blackarch | cut -d’ ’ -f2 | sort -u To see the blackarch categories, run – pacman -Sg | grep blackarch Some of the available groups include To install a category of tools, run – pacman -S blackarch -< category >

    Common Blackarch Tools

    Blackarch-anti-forensic – Packages that are used for countering forensic activities, including encryption, steganography, and anything that modifies files/file attributes.
    Blackarch-automation – Packages that are used for tool or workflow automation.
    Blackarch-decompiler – Packages that attempt to reverse a compiled program into the source code.
    Blackarch-defensive – Packages that are used to protect a user from malware and attacks from other users.
    Blackarch-dos – Packages that use DoS (Denial of Service) attacks.
    Blackarch-mobile – Packages that manipulate mobile platforms.
    Blackarch-networking – Package that involves IP networking.

    Section Item 4.2

    Vivamus efficitur fringilla ullamcorper. Cras condimentum condimentum mauris, vitae facilisis leo. Aliquam sagittis purus nisi, at commodo augue convallis id. Sed interdum turpis quis felis bibendum imperdiet. Mauris pellentesque urna eu leo gravida iaculis. In fringilla odio in felis ultricies porttitor. Donec at purus libero. Vestibulum libero orci, commodo nec arcu sit amet, commodo sollicitudin est. Vestibulum ultricies malesuada tempor.

    Section Item 4.3

    Vivamus efficitur fringilla ullamcorper. Cras condimentum condimentum mauris, vitae facilisis leo. Aliquam sagittis purus nisi, at commodo augue convallis id. Sed interdum turpis quis felis bibendum imperdiet. Mauris pellentesque urna eu leo gravida iaculis. In fringilla odio in felis ultricies porttitor. Donec at purus libero. Vestibulum libero orci, commodo nec arcu sit amet, commodo sollicitudin est. Vestibulum ultricies malesuada tempor.

    Troubleshooting

    Section intro goes here. Lorem ipsum dolor sit amet, consectetur adipiscing elit. Quisque finibus condimentum nisl id vulputate. Praesent aliquet varius eros interdum suscipit. Donec eu purus sed nibh convallis bibendum quis vitae turpis. Duis vestibulum diam lorem, vitae dapibus nibh facilisis a. Fusce in malesuada odio.

    Section Item 5.1

    Vivamus efficitur fringilla ullamcorper. Cras condimentum condimentum mauris, vitae facilisis leo. Aliquam sagittis purus nisi, at commodo augue convallis id. Sed interdum turpis quis felis bibendum imperdiet. Mauris pellentesque urna eu leo gravida iaculis. In fringilla odio in felis ultricies porttitor. Donec at purus libero. Vestibulum libero orci, commodo nec arcu sit amet, commodo sollicitudin est. Vestibulum ultricies malesuada tempor.

    Section Item 5.2

    Vivamus efficitur fringilla ullamcorper. Cras condimentum condimentum mauris, vitae facilisis leo. Aliquam sagittis purus nisi, at commodo augue convallis id. Sed interdum turpis quis felis bibendum imperdiet. Mauris pellentesque urna eu leo gravida iaculis. In fringilla odio in felis ultricies porttitor. Donec at purus libero. Vestibulum libero orci, commodo nec arcu sit amet, commodo sollicitudin est. Vestibulum ultricies malesuada tempor.

    Section Item 5.3

    Vivamus efficitur fringilla ullamcorper. Cras condimentum condimentum mauris, vitae facilisis leo. Aliquam sagittis purus nisi, at commodo augue convallis id. Sed interdum turpis quis felis bibendum imperdiet. Mauris pellentesque urna eu leo gravida iaculis. In fringilla odio in felis ultricies porttitor. Donec at purus libero. Vestibulum libero orci, commodo nec arcu sit amet, commodo sollicitudin est. Vestibulum ultricies malesuada tempor.

    Developements

    Section intro goes here. Lorem ipsum dolor sit amet, consectetur adipiscing elit. Quisque finibus condimentum nisl id vulputate. Praesent aliquet varius eros interdum suscipit. Donec eu purus sed nibh convallis bibendum quis vitae turpis. Duis vestibulum diam lorem, vitae dapibus nibh facilisis a. Fusce in malesuada odio.

    Section Item 6.1

    Vivamus efficitur fringilla ullamcorper. Cras condimentum condimentum mauris, vitae facilisis leo. Aliquam sagittis purus nisi, at commodo augue convallis id. Sed interdum turpis quis felis bibendum imperdiet. Mauris pellentesque urna eu leo gravida iaculis. In fringilla odio in felis ultricies porttitor. Donec at purus libero. Vestibulum libero orci, commodo nec arcu sit amet, commodo sollicitudin est. Vestibulum ultricies malesuada tempor.

    Section Item 6.2

    Vivamus efficitur fringilla ullamcorper. Cras condimentum condimentum mauris, vitae facilisis leo. Aliquam sagittis purus nisi, at commodo augue convallis id. Sed interdum turpis quis felis bibendum imperdiet. Mauris pellentesque urna eu leo gravida iaculis. In fringilla odio in felis ultricies porttitor. Donec at purus libero. Vestibulum libero orci, commodo nec arcu sit amet, commodo sollicitudin est. Vestibulum ultricies malesuada tempor.

    Section Item 6.3

    Vivamus efficitur fringilla ullamcorper. Cras condimentum condimentum mauris, vitae facilisis leo. Aliquam sagittis purus nisi, at commodo augue convallis id. Sed interdum turpis quis felis bibendum imperdiet. Mauris pellentesque urna eu leo gravida iaculis. In fringilla odio in felis ultricies porttitor. Donec at purus libero. Vestibulum libero orci, commodo nec arcu sit amet, commodo sollicitudin est. Vestibulum ultricies malesuada tempor.

    Top Uses

    ​BlackArch is a penetration testing distro that Arch lovers will love. It allows you the freedom to setup your workstation just the way you would want.

    Section Item 7.1

    Vivamus efficitur fringilla ullamcorper. Cras condimentum condimentum mauris, vitae facilisis leo. Aliquam sagittis purus nisi, at commodo augue convallis id. Sed interdum turpis quis felis bibendum imperdiet. Mauris pellentesque urna eu leo gravida iaculis. In fringilla odio in felis ultricies porttitor. Donec at purus libero. Vestibulum libero orci, commodo nec arcu sit amet, commodo sollicitudin est. Vestibulum ultricies malesuada tempor.

    Section Item 7.2

    Vivamus efficitur fringilla ullamcorper. Cras condimentum condimentum mauris, vitae facilisis leo. Aliquam sagittis purus nisi, at commodo augue convallis id. Sed interdum turpis quis felis bibendum imperdiet. Mauris pellentesque urna eu leo gravida iaculis. In fringilla odio in felis ultricies porttitor. Donec at purus libero. Vestibulum libero orci, commodo nec arcu sit amet, commodo sollicitudin est. Vestibulum ultricies malesuada tempor.

    Section Item 7.3

    Vivamus efficitur fringilla ullamcorper. Cras condimentum condimentum mauris, vitae facilisis leo. Aliquam sagittis purus nisi, at commodo augue convallis id. Sed interdum turpis quis felis bibendum imperdiet. Mauris pellentesque urna eu leo gravida iaculis. In fringilla odio in felis ultricies porttitor. Donec at purus libero. Vestibulum libero orci, commodo nec arcu sit amet, commodo sollicitudin est. Vestibulum ultricies malesuada tempor.

    Resources

    Section intro goes here. Lorem ipsum dolor sit amet, consectetur adipiscing elit. Quisque finibus condimentum nisl id vulputate. Praesent aliquet varius eros interdum suscipit. Donec eu purus sed nibh convallis bibendum quis vitae turpis. Duis vestibulum diam lorem, vitae dapibus nibh facilisis a. Fusce in malesuada odio.

    Section Item 9.1

    Vivamus efficitur fringilla ullamcorper. Cras condimentum condimentum mauris, vitae facilisis leo. Aliquam sagittis purus nisi, at commodo augue convallis id. Sed interdum turpis quis felis bibendum imperdiet. Mauris pellentesque urna eu leo gravida iaculis. In fringilla odio in felis ultricies porttitor. Donec at purus libero. Vestibulum libero orci, commodo nec arcu sit amet, commodo sollicitudin est. Vestibulum ultricies malesuada tempor.

    Section Item 9.2

    Vivamus efficitur fringilla ullamcorper. Cras condimentum condimentum mauris, vitae facilisis leo. Aliquam sagittis purus nisi, at commodo augue convallis id. Sed interdum turpis quis felis bibendum imperdiet. Mauris pellentesque urna eu leo gravida iaculis. In fringilla odio in felis ultricies porttitor. Donec at purus libero. Vestibulum libero orci, commodo nec arcu sit amet, commodo sollicitudin est. Vestibulum ultricies malesuada tempor.

    Section Item 9.3

    Vivamus efficitur fringilla ullamcorper. Cras condimentum condimentum mauris, vitae facilisis leo. Aliquam sagittis purus nisi, at commodo augue convallis id. Sed interdum turpis quis felis bibendum imperdiet. Mauris pellentesque urna eu leo gravida iaculis. In fringilla odio in felis ultricies porttitor. Donec at purus libero. Vestibulum libero orci, commodo nec arcu sit amet, commodo sollicitudin est. Vestibulum ultricies malesuada tempor.

    FAQs

    Section intro goes here. You can list all your FAQs using the format below.

    Section Item 9.1 (FAQ Category One)

    Is BlackArch Linux the right pentesting distribution for me?

    BlackArch is a Linux pentesting distribution based on ArchLinux. If you're not familiar with ArchLinux, or Linux in general, we strongly suggest you avoid BlackArch due to the learning curve for new users.

    Where do I start with BlackArch?

    You must first get an ISO on the downloads page and install it by following the instructions of the installation script. You can find our tutorial to look the process step by step at Blackarch installation part. If you encounter any problems and need help, the best place to ask is there IRC channel.

    Is BlackArch up to date?

    BlackArch is constantly being updated and offers the latest packages available on Github. We release a new ISO four times a year (quarterly). These new images contain packages that are up to date, and usually include bug fixes. If you find any package that is outdated and wish to see it up to date, please report it as an issue on our Github repository Github.

    How can I fetch/install the latest update available?

    By simply running pacman -Syu --needed --overwrite='*' blackarch. This command requires root privileges.

    Section Item 9.2 (FAQ Category Two)

    Why do I get invalid keyring signature?

    It could happen for a wide range of reasons. Below you will find a few suggestions.

    • You don't have an internet connection (as you can imagine, a rare problem and can be verified quickly).
    • You may have a DNS problem, that can't resolve pgp.mit.edu accordingly. Please check your DNS settings (pgp.mit.edu works best with 8.8.8.8 DNS Server).
    • You may have a network issue, different from the above one, which is hard for us to help since it can be a myriad of things. For example: DNS caching.
    • You may have a clock/time issue.
    • You may have something blocking your communication with mit.edu server, for instance: a firewall.
    • If you're connected through a VPN, try to temporarily disable it and run strap.sh again.
    • After testing all the items described above if you still have problems using strap.sh, try the options below:

    1st option:

    # rm -rf /etc/pacman.d/gnupg

    # pacman-key --init

    # pacman-key --populate archlinux blackarch

    # pacman-key --update --keyserver keyserver.ubuntu.com

    2nd option:

    You could try to change to pgp.mit.edu's IP address using the following command:

    # curl -O https://blackarch.org/strap.sh

    # chmod +x strap.sh

    # sha1sum strap.sh: it should match with the information on downloads

    # sh strap.sh

    It's very important to follow the suggestions above as well as checking the Archlinux Wiki pages to assist you as needed. If you still encounter any problems, pay us a visit at #blackarch.

    Where can I get help for a problem that I'm facing?

    Depending on the problem you're facing, you can visit our Github and submit an issue on our Issue page, such as:

    • BlackArch Site repository: related to our website. For example: If a link is broken or an image isn't loading.
    • BlackArch repository: related to our packages. For example: a package hasn't been updated for a while or failed to run.
    • BlackArch Installer repository: related to our installer. For example: the installation failed or you can not boot after a successful installation. You can also take some time to browse our other repositories.
    If you still cannot find a solution to your problem, visit our IRC channel and ask for help. But please be advised, BlackArch users are in different parts of the globe (different time zones). Therefore, be patient. Ask your question and wait for a reply.

    I would like to help. What can I do?

    You Can registered into our contribution panel .

    Where arcu sed urna gravida?

    Aenean et sodales nisi, vel efficitur sapien. Quisque molestie diam libero, et elementum diam mollis ac. In dignissim aliquam est eget ullamcorper. Sed id sodales tortor, eu finibus leo. Vivamus dapibus sollicitudin justo vel fermentum. Curabitur nec arcu sed urna gravida lobortis. Donec lectus est, imperdiet eu viverra viverra, ultricies nec urna.

    Section Item 9.3 (FAQ Category Three)

    How to dapibus sollicitudin justo vel fermentum?

    Donec sodales sagittis magna. Sed consequat, leo eget bibendum sodales, augue velit cursus nunc, quis gravida magna mi a libero. Fusce vulputate eleifend sapien. Vestibulum purus quam, scelerisque ut, mollis sed, nonummy id, metus. Nullam accumsan lorem in dui.

    How long bibendum sodales?

    Fusce vulputate eleifend sapien. Vestibulum purus quam, scelerisque ut, mollis sed, nonummy id, metus. Nullam accumsan lorem in dui.

    Where dapibus sollicitudin?

    Aenean et sodales nisi, vel efficitur sapien. Quisque molestie diam libero, et elementum diam mollis ac. In dignissim aliquam est eget ullamcorper. Sed id sodales tortor, eu finibus leo. Vivamus dapibus sollicitudin justo vel fermentum. Curabitur nec arcu sed urna gravida lobortis. Donec lectus est, imperdiet eu viverra viverra, ultricies nec urna.